
Configuring user roles
Roles & Permissions
Secure, role-based access.
Before inviting users, administrators should define roles that reflect their organization's structure and security requirements.
Key concepts:
- A role is a predefined set of permissions that controls what a user can see and do in the Atlar dashboard.
- Assigning the correct roles helps maintain security, efficiency, and compliance across your organization.
- Roles are required when inviting users—each user must be assigned at least one role.
Users can have multiple roles in the same organization, but only one role is active at a time.
This approach supports the principle of least privilege, ensuring users have only the access necessary for their tasks.
Recommendation: For users with the Owner role, assign an additional everyday role for routine work.
This limits use of the powerful Owner role to situations where it’s truly necessary, reducing the risk of administrative errors.
Permission Levels
Permissions range from basic access—such as viewing data—to advanced access, like managing settings or viewing sensitive financial information.
Best Practice:
Only assign higher-level roles to users who genuinely need them.
For production organizations, always follow the principle of least privilege: users should have the minimum access required for their responsibilities.
Assigning Roles
When inviting a user to the platform, assign them a role based on their responsibilities.
This ensures they only have access to the data and features they need.
How to Configure Roles and Permissions
Preparation:
Review the Best Practice section before creating new roles.
Follow these steps:
- Navigate to User Management → Roles in the Atlar dashboard.
- Click Create New in the top-right corner.
- Define role permissions:
- Choose between Simple Setup or Advanced Setup.
- For details on the permission structure, see Key Concepts.
- Follow the principle of least privilege—only assign the minimum permissions required.
- If Select Accounts is shown in the bottom-right corner, continue to step 4.
- If See Role Summary appears instead, skip to step 5.
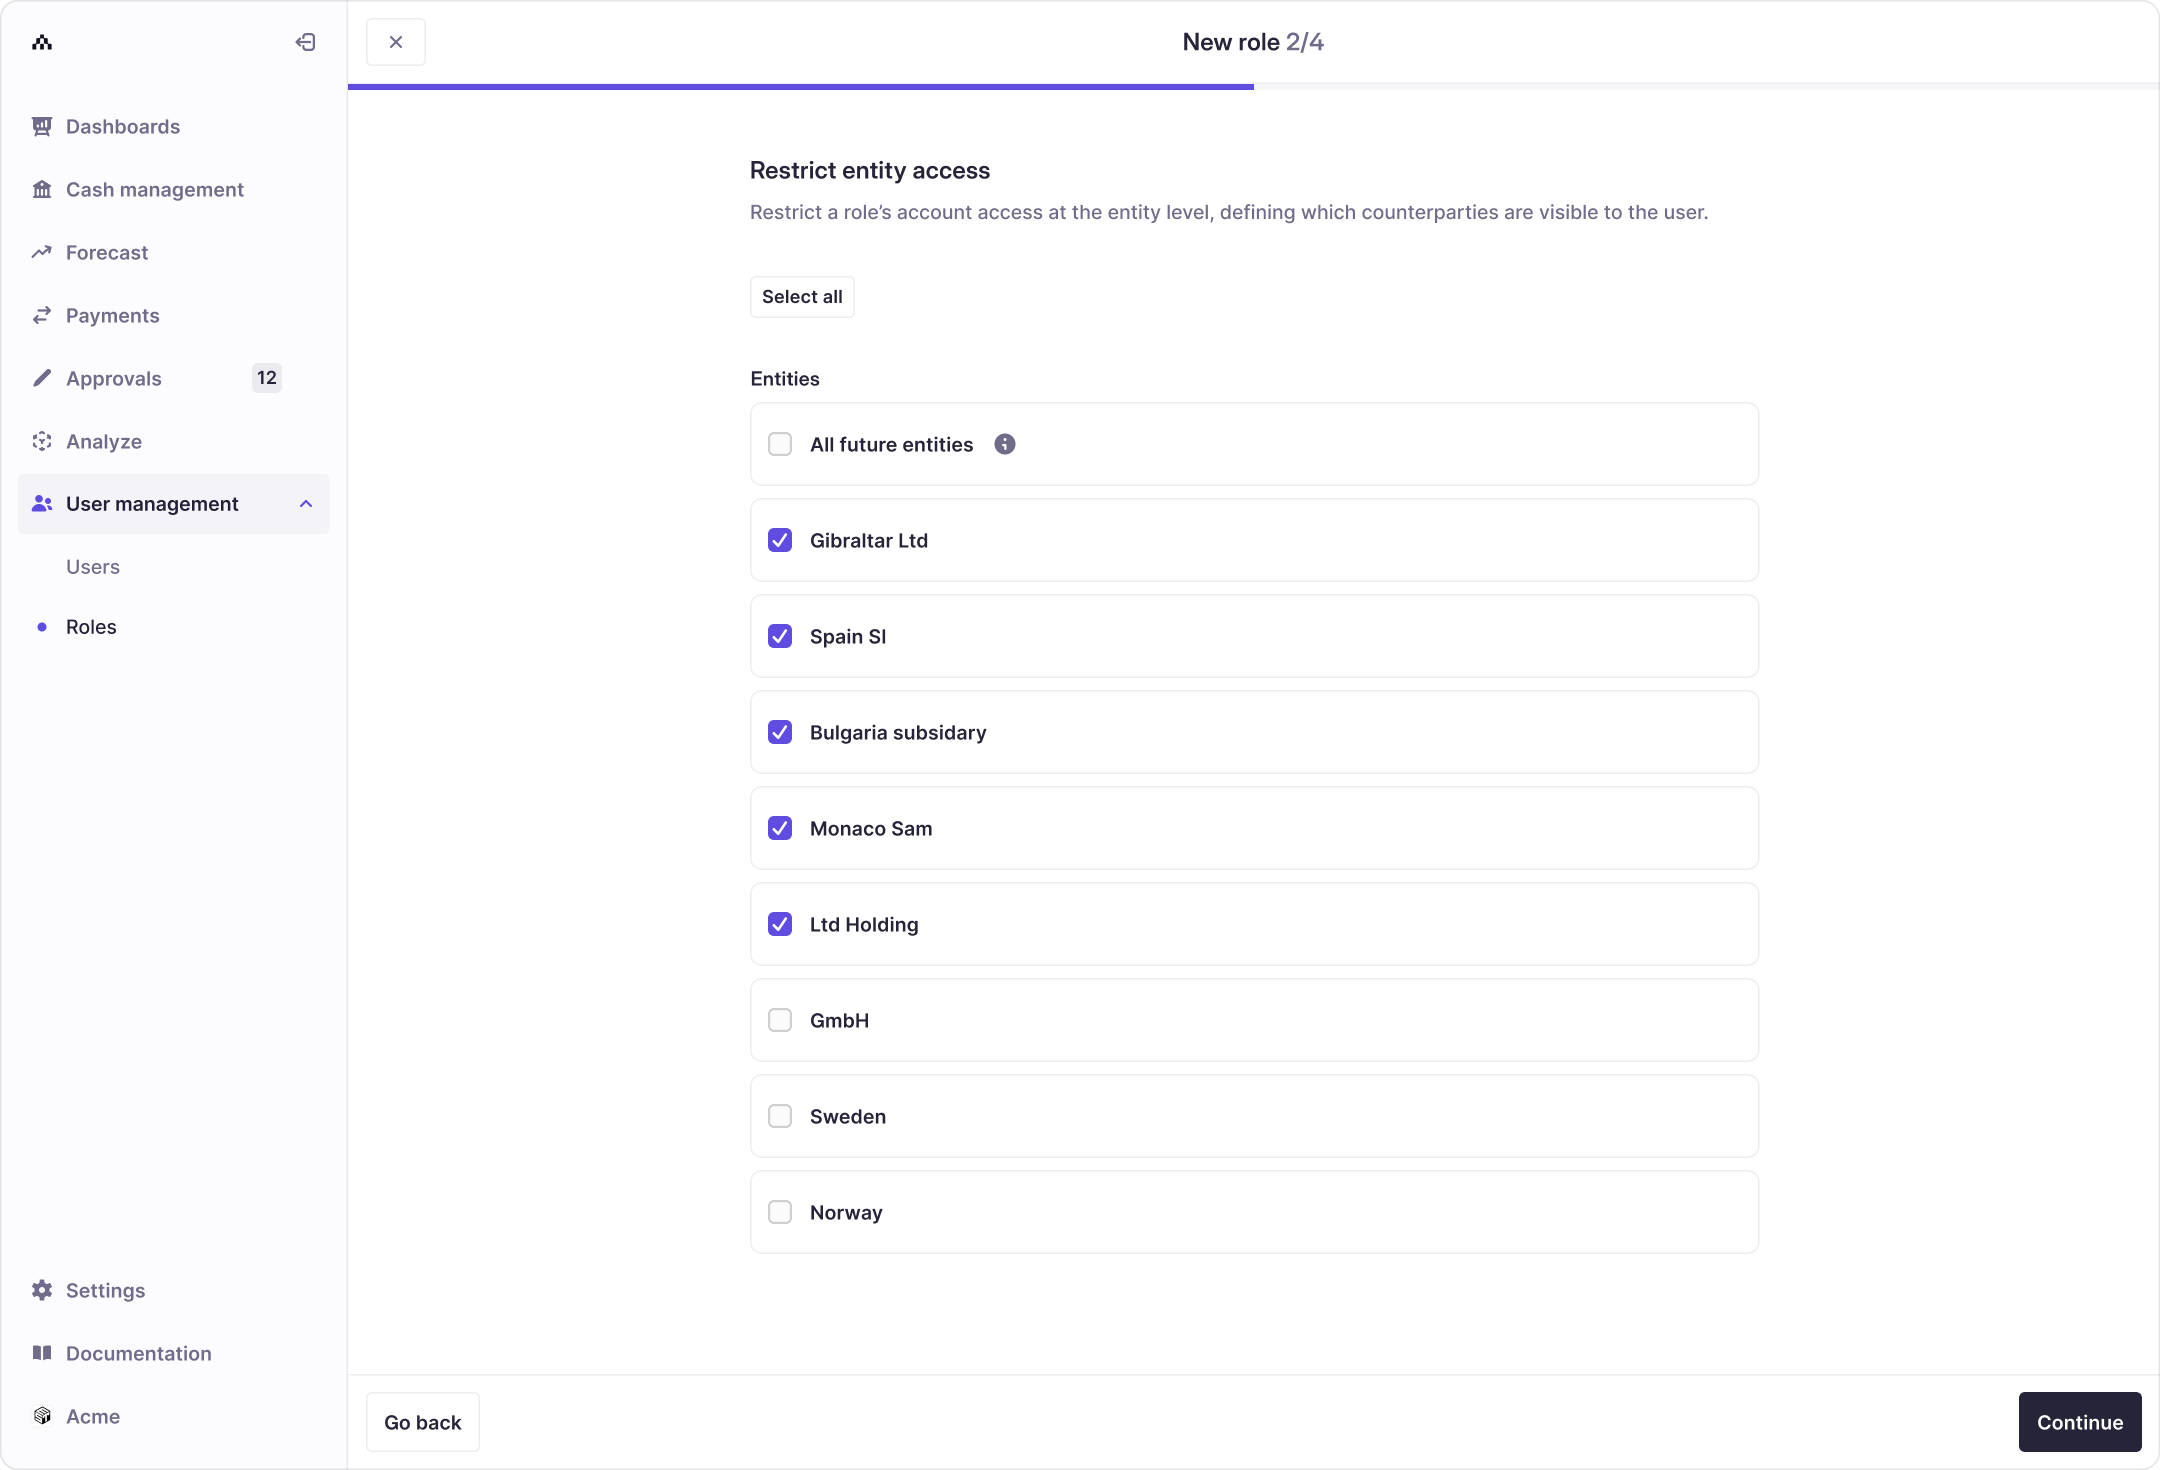
- Select Accounts:
- To grant access to all current and future accounts and entities, select All future entities.
- To restrict access, deselect All future entities and choose specific accounts.
- Complete Role Setup:
- Review the role configuration.
- Assign a clear, descriptive name (e.g., Accounting, Approver).
- Click Create to finalize the role.
Once created, the role will be available for assignment when inviting users.
Updated 10 months ago