
Notifications
This guide will walk you through how our notification engine works and how to set it up.
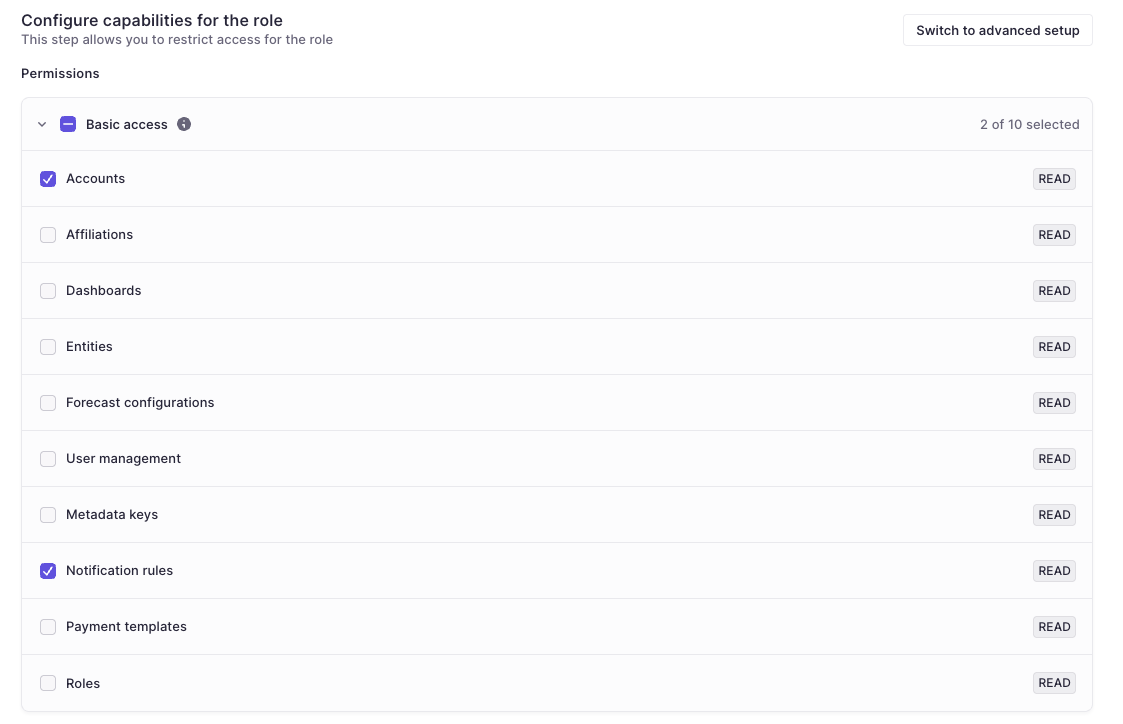
Prerequisite: Ensure "Notification Rules" READ permissions are enabled in Basic Access permission section of the role before starting. This permission is needed in order to see and subscribe to notifications.
Stay on top of critical events. Notifications allow you to automate alerts for specific triggers such as payment approvals, low balances, or failed transactions.
- Admins can create rules to target specific users or make alerts available for subscription to the wider team.
- Users can manage their own subscriptions and view alerts in a dedicated Inbox.
How Notifications work
Notifications are powered by notification rules that live in: Settings → Notification Setup. There are two main types of notification rules:

Targeted notifications
Targeted notifications send alerts to specific users or emails.
- When to use: Use this when you need to ensure a specific person (e.g. a Finance Director or a shared inbox) always receives an alert.
- Behavior: Users cannot opt-out of targeted notifications. If you want users to have the choice, use a Subscribable rule instead.
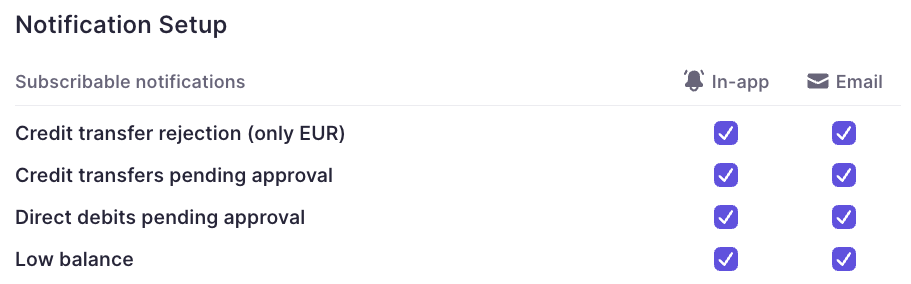
Subscribable rules
Subscribable rules will show up on all users' Profiles (provided they have sufficient permissions). From there, users can opt in to receive notifications by clicking on the checkbox for their preferred delivery method.
Building a notification rule
Create the rule
To create a notification rule, go to Notification Setup, click Actions in the top right, and select Create new.
You will find a few notification templates that we have built for you; these are entirely customizable. You can also build a notification entirely from scratch by clicking the + Custom notification button.

Configure the rule
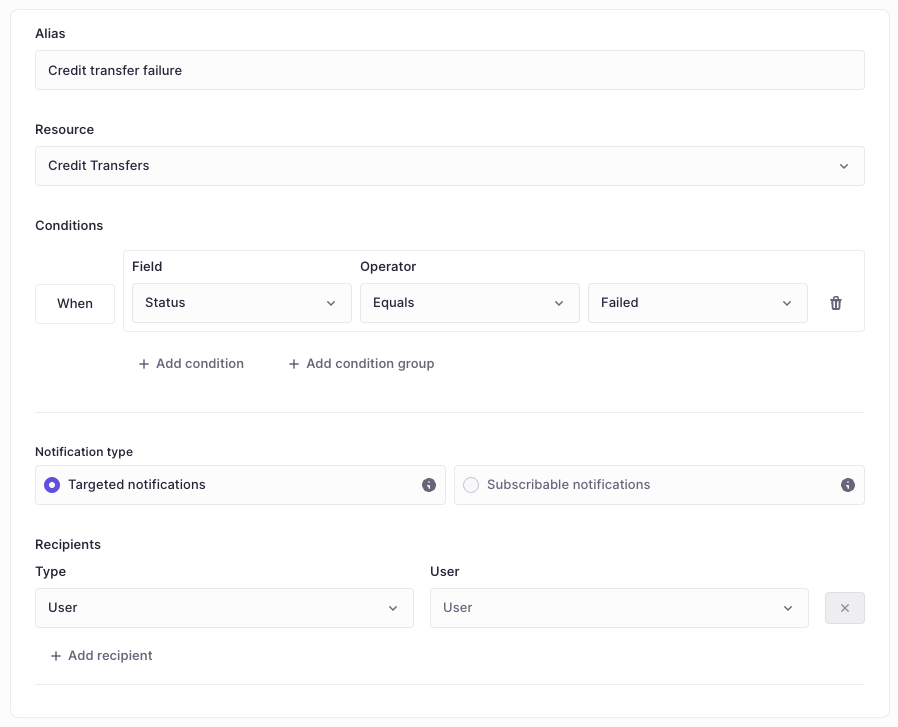
- Alias: This is the name of the notification and the message the user will see in their inbox/email subject when triggered.
- Resource: The dataset the conditions should evaluate (e.g., Credit Transfers, Direct Debits, or Balances).
- Conditions: The specific criteria that must be met for the notification to trigger.
- Condition group: Use this for advanced conditions. For example, trigger a notification only when:
- Credit transfer status equals failed AND * (amount is more than 10,000 EUR OR market is FR)
- Notification type:
- Targeted: A specific user or email receives the notification.
- Subscribable: No specific recipient; each user chooses to opt-in or out.
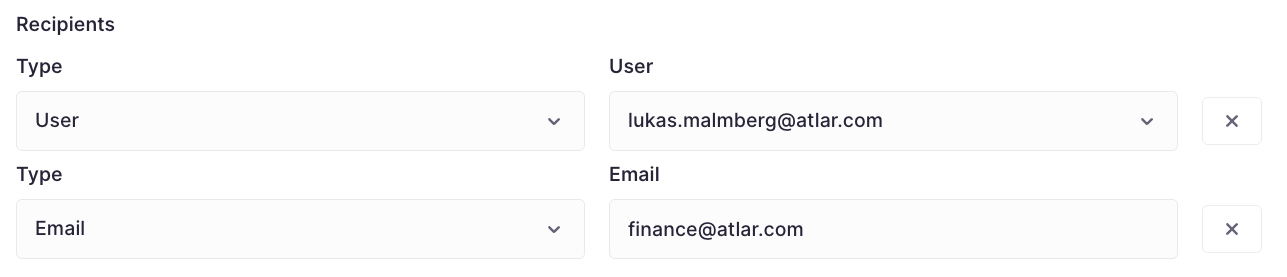
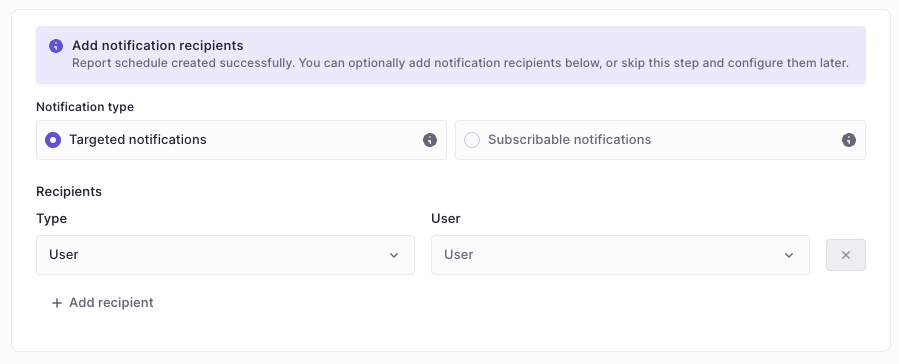
- Targeted notifications >> Recipients:
- User: Select a specific user in the platform.
- Email: Send to a specific email address (no sensitive information is exposed in the email body).
- Subscribable notifications >> Recipients:
- Dynamic Recipient: Generally, you leave this blank so users can opt-in themselves. However, you can assign a recipient dynamically based on the event.
- Example: If you want the creator of a payment to be notified when that payment fails, select the dynamic "Creator" option here.
- Note: Subscribable notifications are available to all users with permission but are turned OFF by default.
Report schedules
You can also receive reports as notifications on a set schedule. To do so, go to Reporting → Reports → Schedules.
Here, you can set up a schedule to receive a report in your email or inbox:
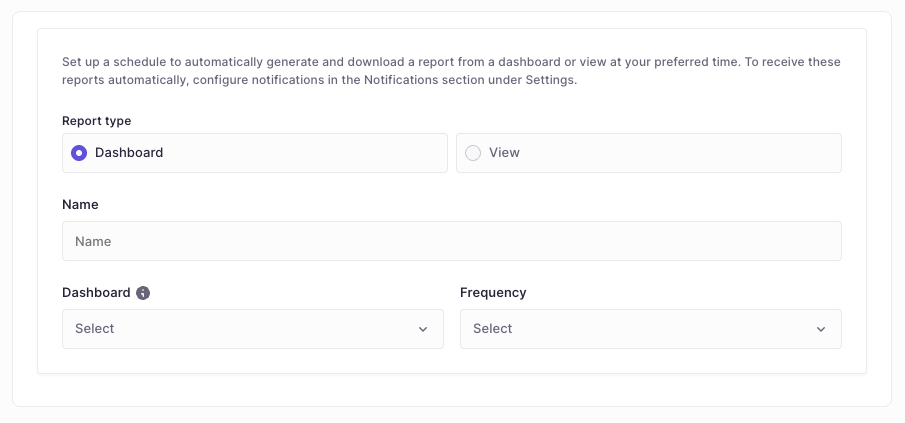
- Report type: Choose whether a Dashboard or a View should be sent out.
- Name: The name of the report schedule.
- Dashboard / view: The specific dashboard or view to send.
- Frequency: How often the report is sent.
Once configured, the report will be generated automatically. You can optionally send it to a specific set of users or make it available for subscription on user profiles. If you don't want the report sent immediately, click Skip in the bottom left corner to save the schedule without sending.
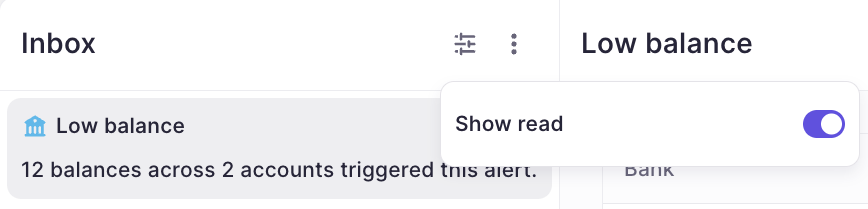
The Inbox
The Inbox is a centralized place for notifications received in-app. You will see all your notifications on the left-hand side. Clicking on any item will preview the relevant details on the right-hand side so you don't lose context.

You can configure the view to show all notifications or only Unread items. You can also mark a notification as unread by right-clicking on it and selecting Mark as unread if you need to return to it later.
Security and permissions
Permissions
Users must have Read Access to Notification Rules to receive alerts and be able to subscribe to notifications.
In order for users to subscribe to notifications, they need a minimum of 'Read' access to Notification Rules.
In order to:
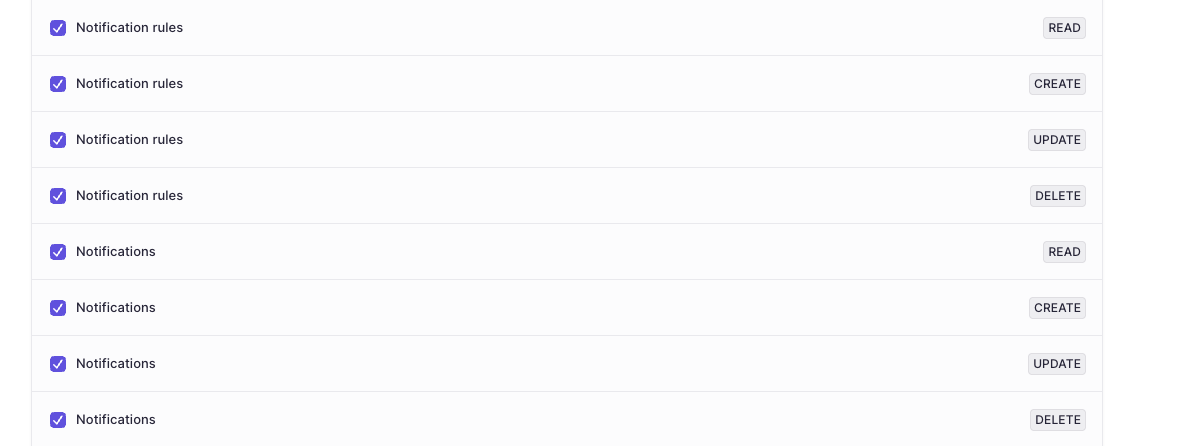
- manage notification rules, you need read, create, update, and delete permissions on Notification Rules
- see sent notifications for the entire org, you need read, create, update, delete on Notifications
This is found under the "Manage Dashboard" permission group
Smart Scope & Security
You don't need to create separate rules for every team or entity. The notification engine respects the existing permissions of every user and will not allow a user to view items that they don't have permission to just because they received a notification.
- Contextual alerts: If you set up a broad rule (e.g., "Notify on all Failed Payments"), users will only be notified about payments they actually have permission to view.
- No noise: A user managing the French entity that doesn't have access to other entities will not receive alerts regarding the UK entity, even if they are both subscribed to the same "Failed Payment" rule.
Updated 6 months ago